DONGGUAN XINRUN SILICONE NEW MATERIALS LIMITED
GLOBAL LEADING MANUFACTURER OF MOLDMAKING CASTING MATERIALS FOR MORE THAN 10 YEARS
Hotline: 0086-0769-89600400 Email: info@xrsil.com Skype: info@xrsil.com
GLOBAL LEADING MANUFACTURER OF MOLDMAKING CASTING MATERIALS FOR MORE THAN 10 YEARS
Hotline: 0086-0769-89600400 Email: info@xrsil.com Skype: info@xrsil.com
How To Use Liquid Epoxy Resin To Make Epoxy Resin River Table /tabletop ?
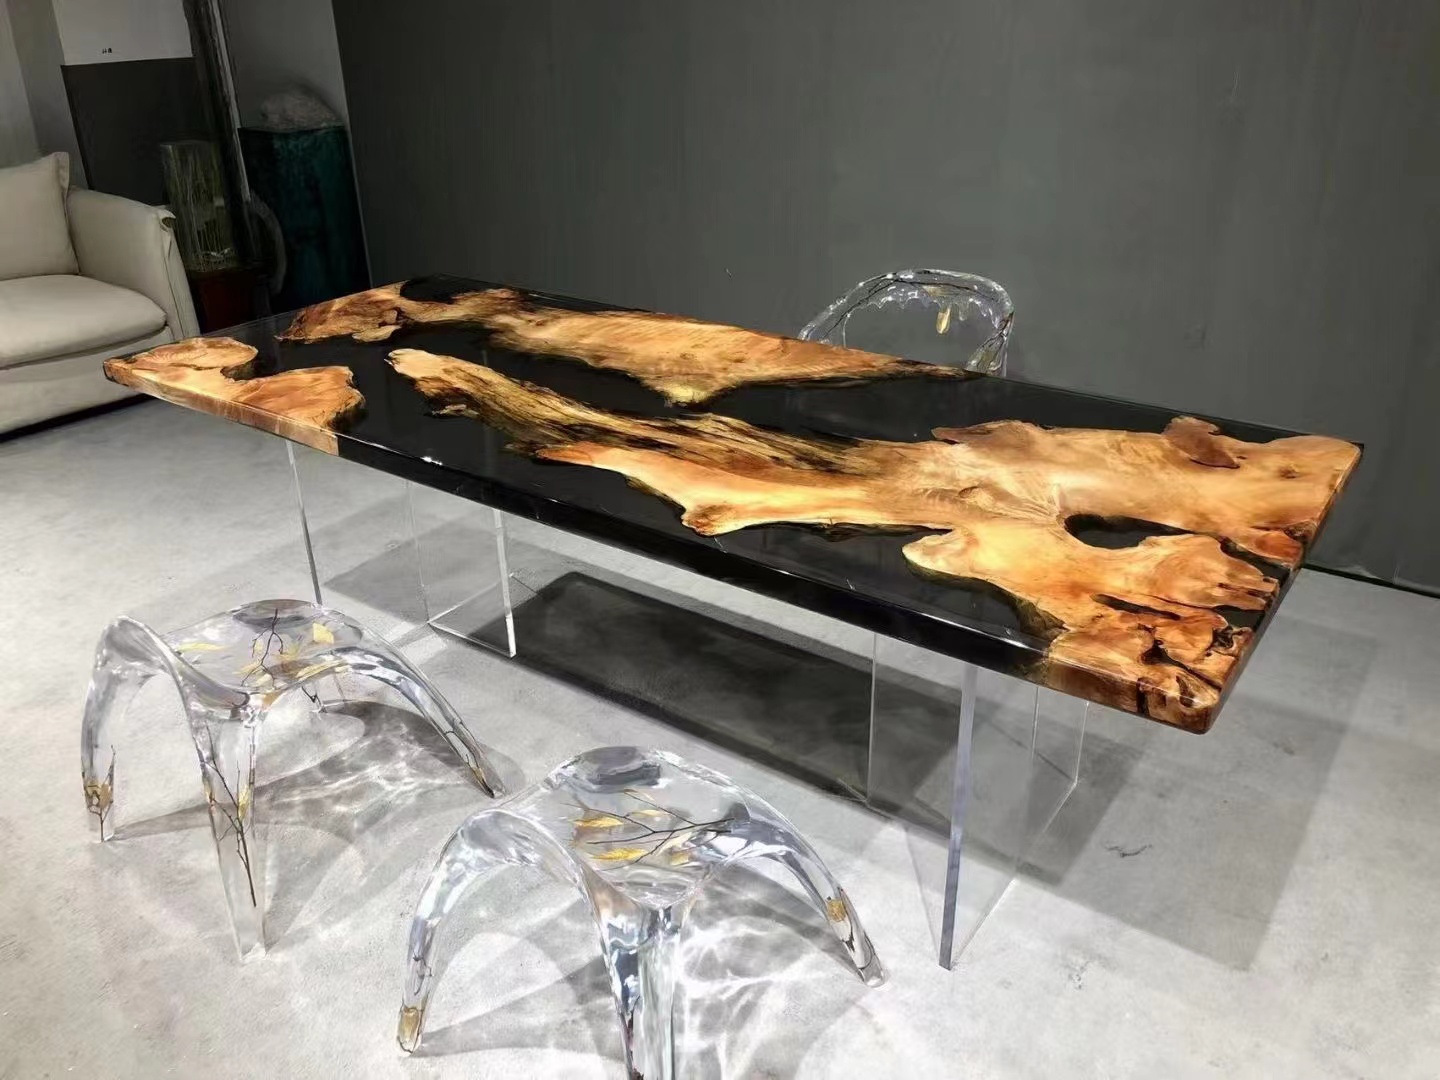
Step 1: Preparing The Wood Slabs
If you want to prepare the wood yourself, you will need a hand circular saw and a planing machine. Before you can start, the wood has to be cut to the right length and angle and divided in the middle. It must also be planed to an even thickness.
For a River Table, you need a wooden board that is as natural as possible or a board made of a tree trunk that is at least 1.6 inches thick.
Step 2: Filling Cracks and Sealing the Wood
All cracks, porous and uneven areas in the wood should be filled with epoxy resin. Use crystal clear resin without pigment. If the irregularities are on the edges, you can seal the edges with a stable adhesive tape before sealing, so that the resin does not run off over the edges. When the filled cracks and the like are completely cured, you should seal all the wood with resin.
Step 3: Building Your Mold for the Resin Table Top
In order to be able to cast the epoxy resin, a mold is assembled from MDF boards in the length of your wood and in the size of the desired tabletop. The preparation is not difficult, but some care must be taken and accurately measured. For the shape, you use 15mm MDF boards on the bottom and sides at pray. The side panels should be about 10 mm higher than the actual tabletop. The side panels are fastened to the underside with screws or alternatively glued together with hot glue. Then it is best to use clear sanitary silicone to seal the edges. Here you should work very exactly and not forget anything, the form must be 100% tight.
A very important step now is to apply a release agent into the finished mold. You can either glue the mold completely with tape (Ducktape) or use liquid-release wax. Alternatively, you can spray the mold with silicone spray or Teflon spray. With silicone spray, it is advisable to apply up to three layers. The use of a release agent is very important for later removal of the tabletop, as otherwise the resin would adhere to the MDF and the parts of the mold would be very difficult to remove from the resin table. It is also essential that the substrate or work surface where the mold is placed is absolutely in balance. Otherwise, the resin would become crooked and leak later.
Step 4: Fixing the Wood into the Mold
After the mold is finished, you can insert the wood. Push the wood into exactly the position you want it in the finished table and fix it well with several parallel clamps. For smaller tables, you can weigh down the wood with bricks, for example. Note, however, that all devices or parts used to fasten the wood can come into contact with the resin. It is highly recommended that you apply a sanitary silicone barrier to the wood along the edge of the river.
However, you should not pull the barrier too close to the edge – keep a distance of 0.4 to 0.8 inch so that the resin is poured in cleanly. With such a barrier you prevent the resin from spreading over the whole table.
Do you know How To Make Epoxy Resin River Table /tabletop now ?
If you need help , please feel free to let us know, we 'd love to help .
Please share this article to your friends who may need this . They will thank you for it.
2023-05-12